How to sew your own trousers: Step-by-Step Guide
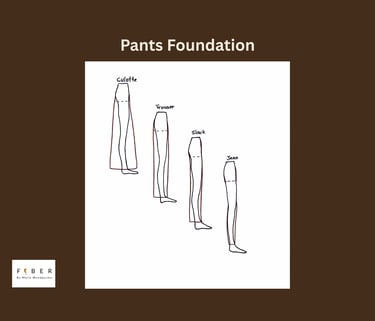
There are many methods for drafting pants using precise body measurements rather than replicating an existing pair. This approach, however, offers the unique advantage of allowing you to visualize the silhouette as it takes shape, while giving you the flexibility to refine subtle design details along the way. Having a set of key measurements and a basic foundation is helpful when beginning the patternmaking process, but this method is not intended to produce a final pattern. Instead, it serves as a time-efficient tool to establish the overall volume and structure of the garment. Trousers are a style of pants that typically fall straight from the crotch, creating a clean and comfortable silhouette. In this design, the fit has been slightly refined to align more closely with slack pants, which are tailored to sit nearer to the body than traditional trousers. In this guide, you will learn how to create your own trousers—from initial pattern development through to final construction.
Fakhra Abrar
3/22/20263 min read

Make your Trouser Pattern Draft
It is essential to have a good understanding of garment construction in order to understand patternmaking and how a two dimensional template correspond to a body shape.
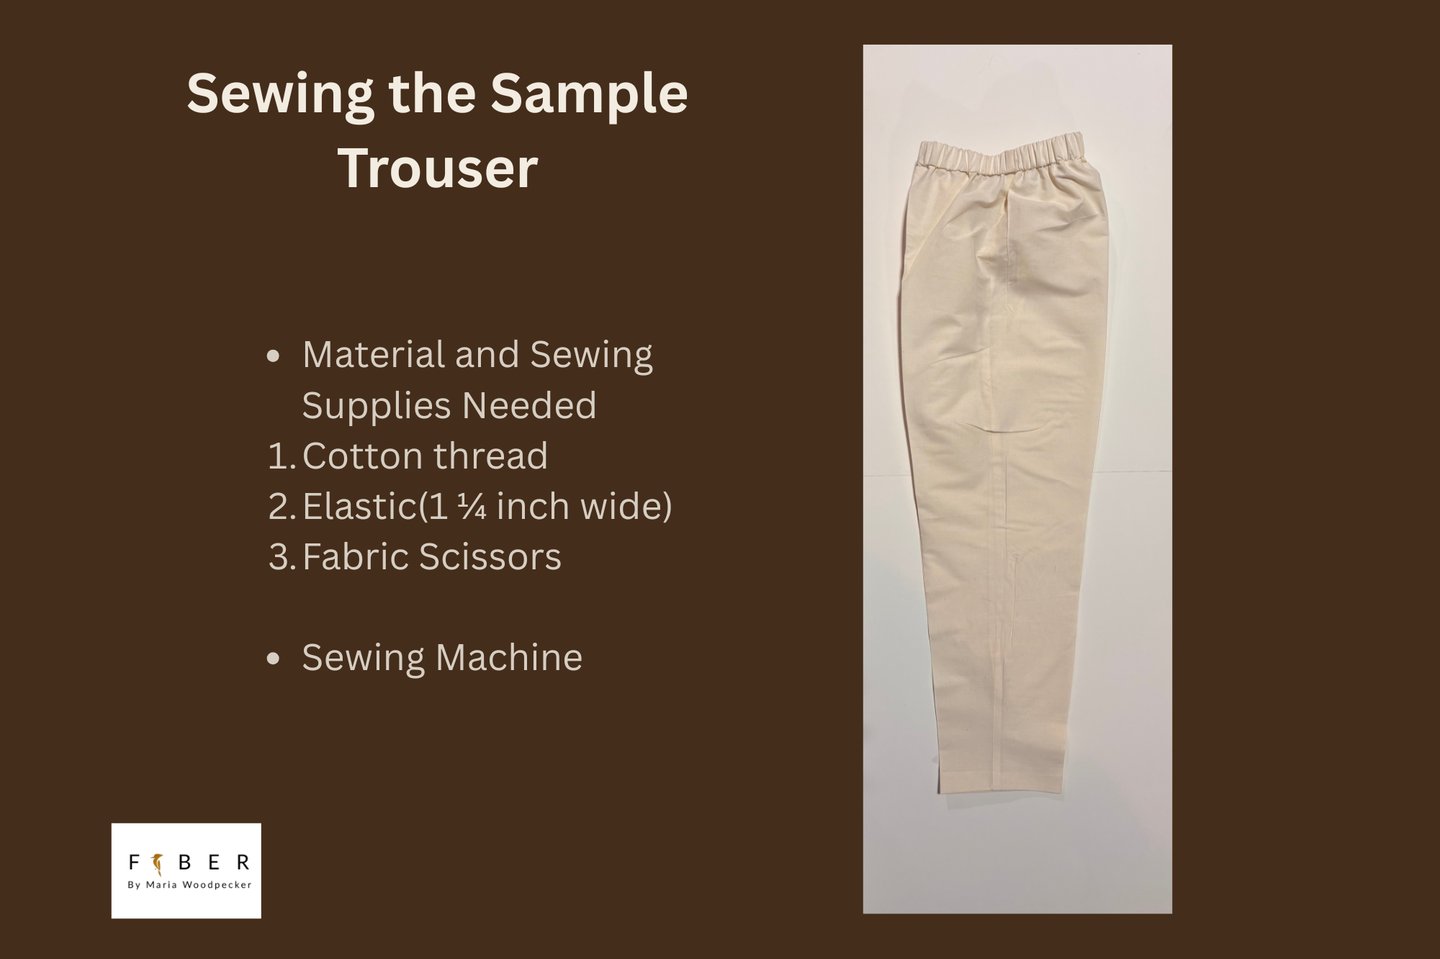
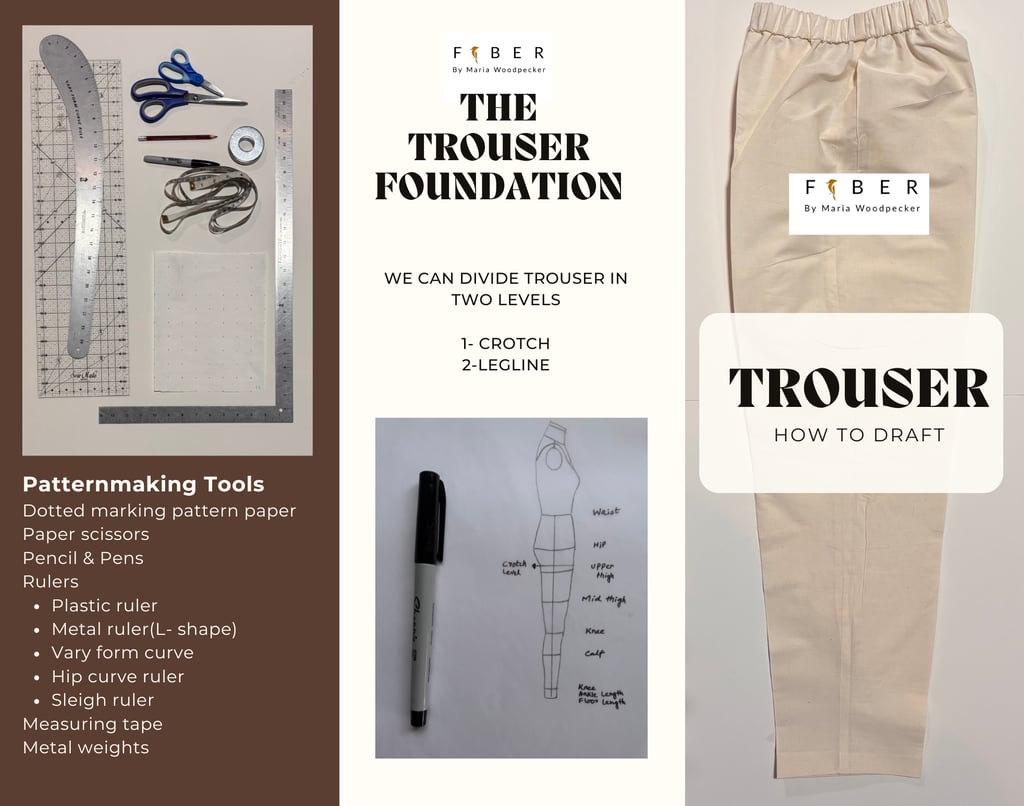
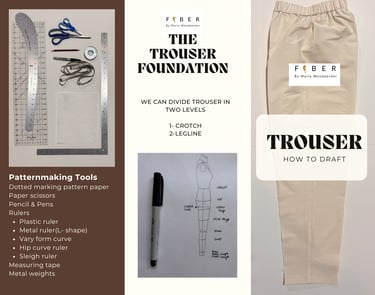
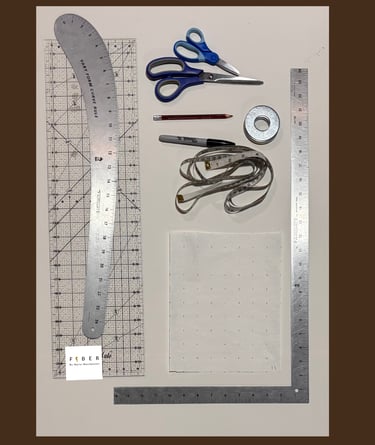
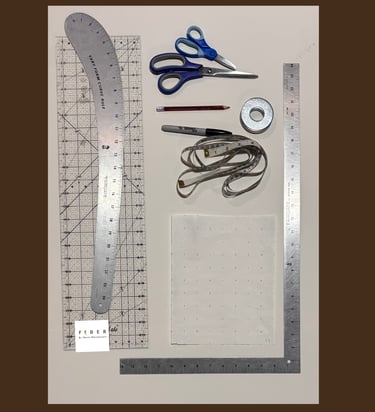
In order to make the trouser pattern, you will need:
Patternmaking Tools:
1-Dotted marking pattern paper white
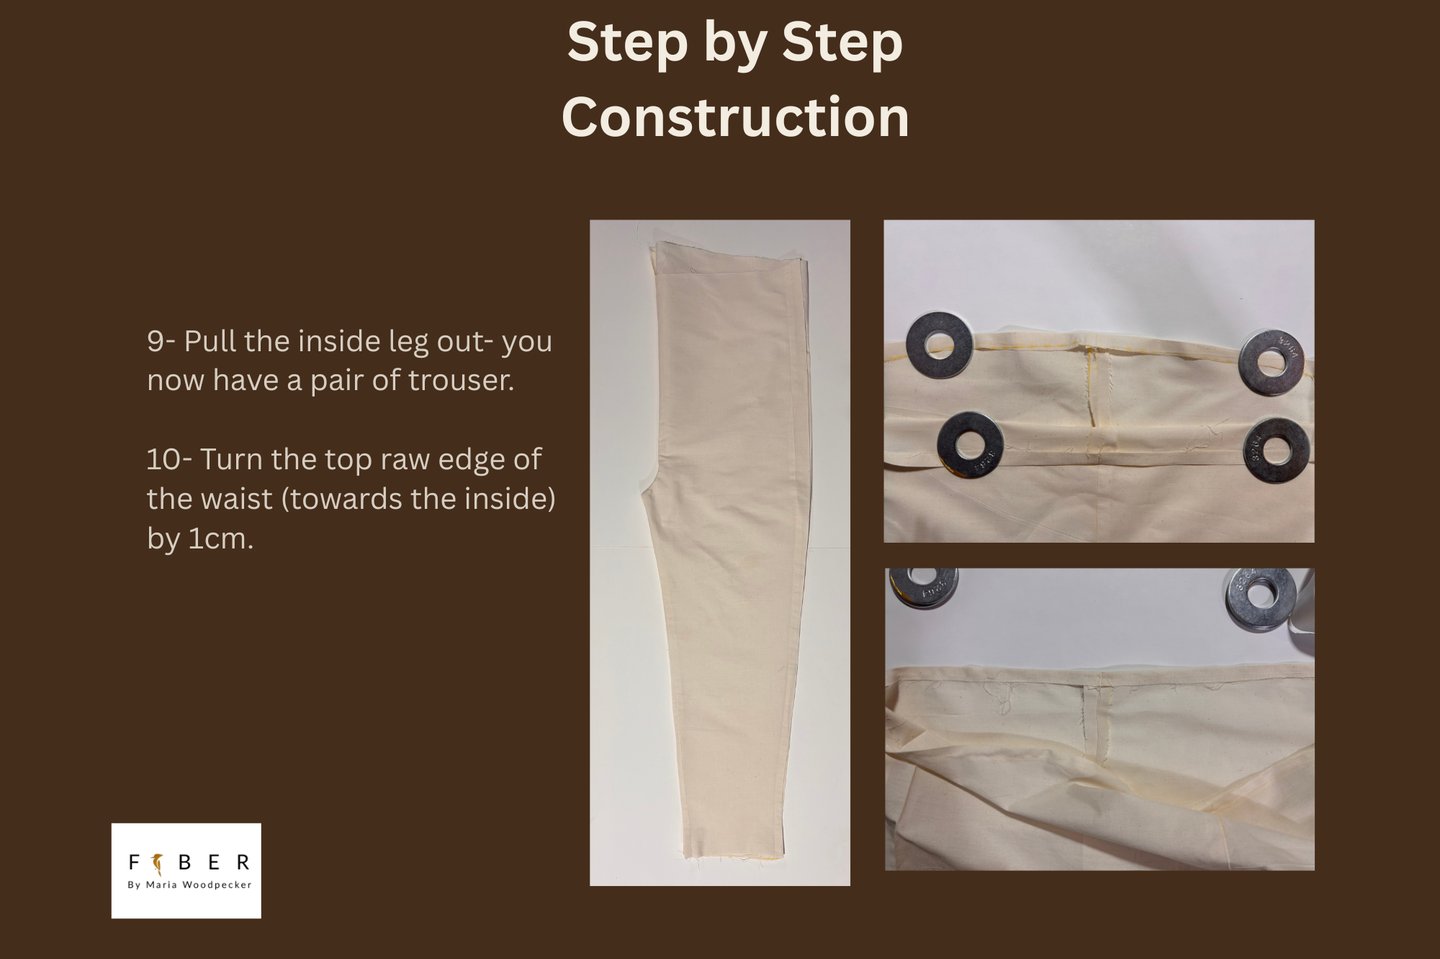
2-Pencil & eraser
3-Paper scissor
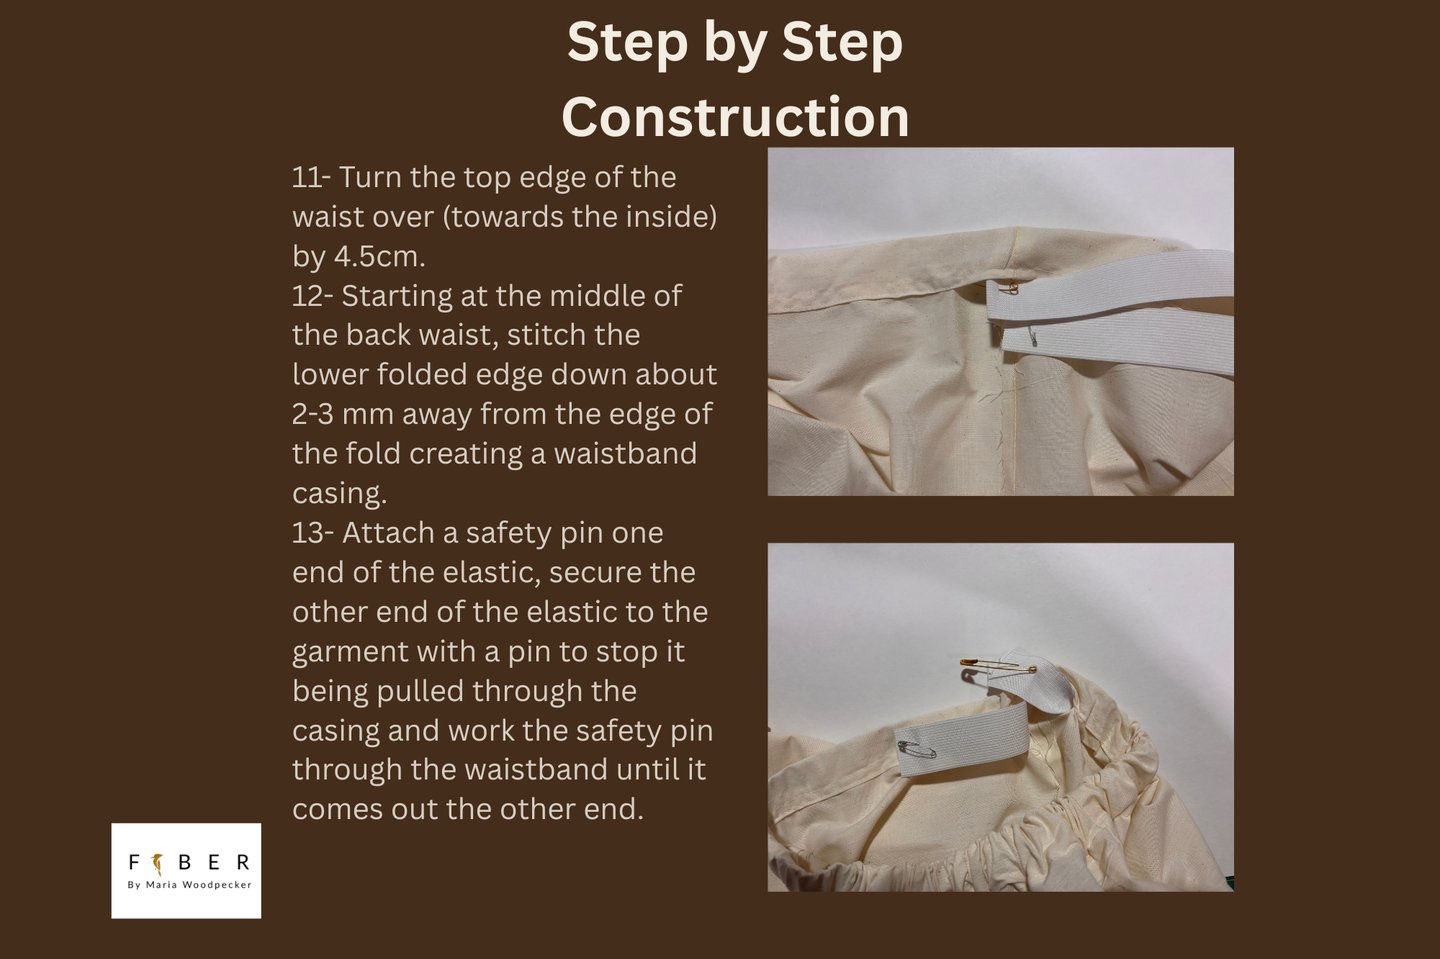
4-Ruler
Plastic ruler
Metal ruler L-Shape
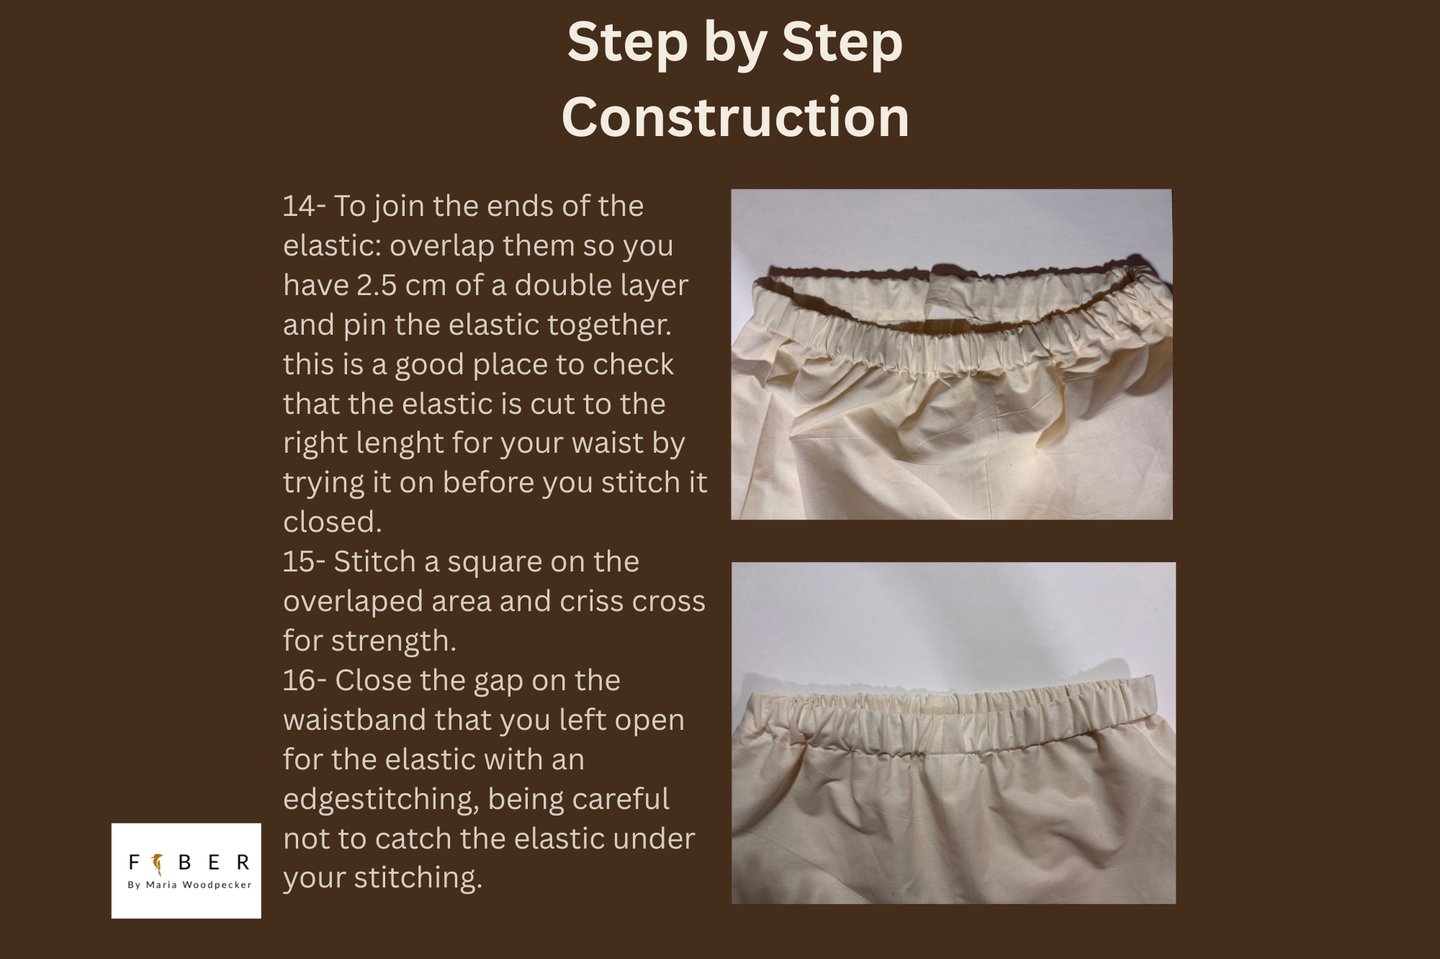
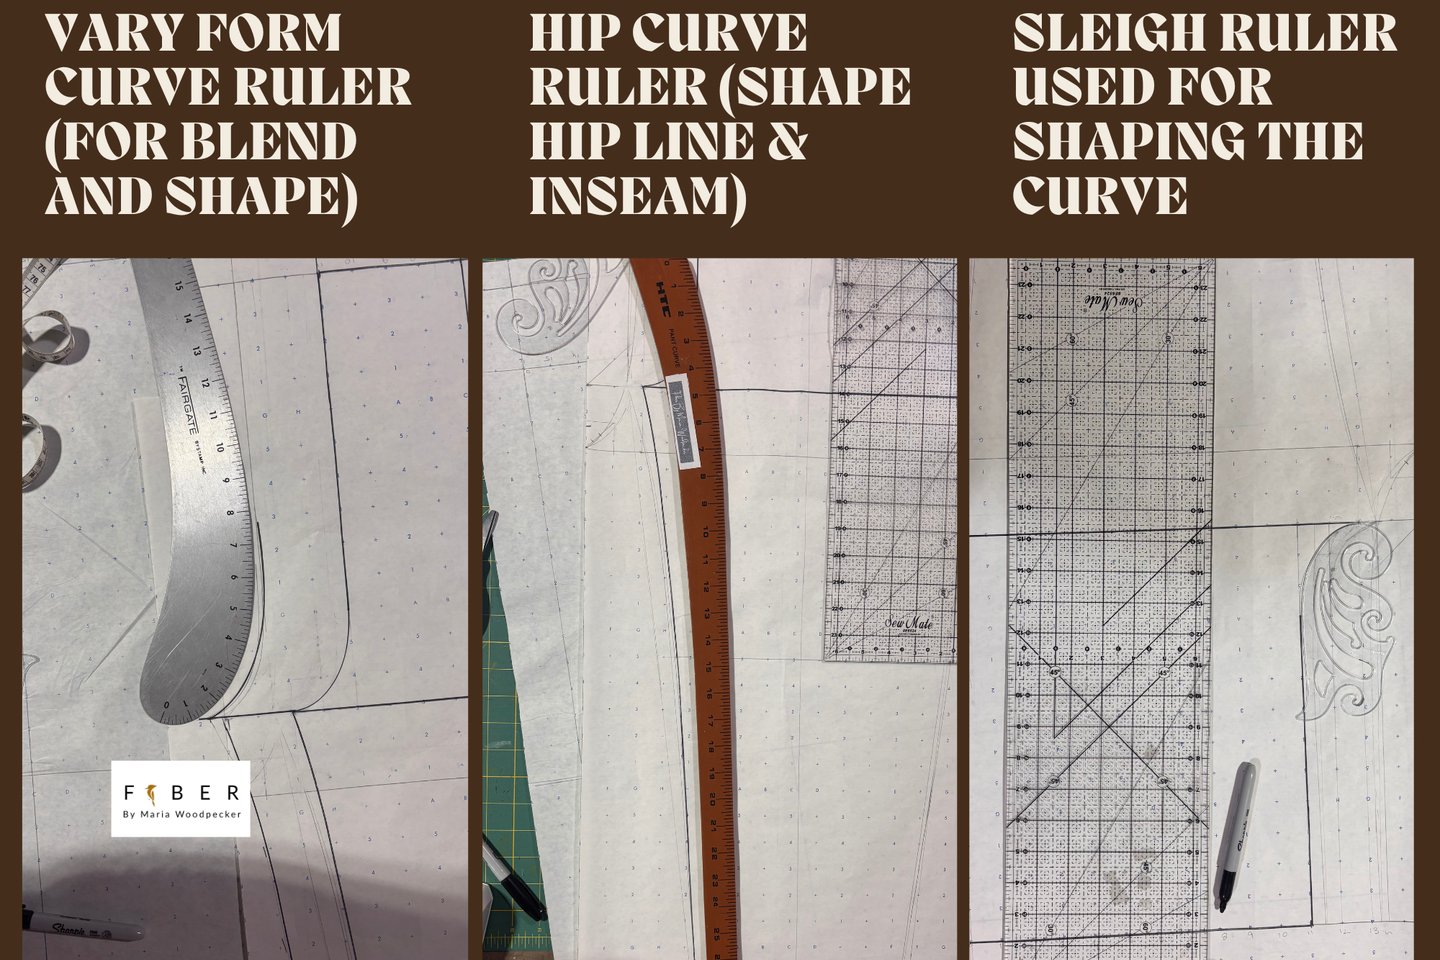
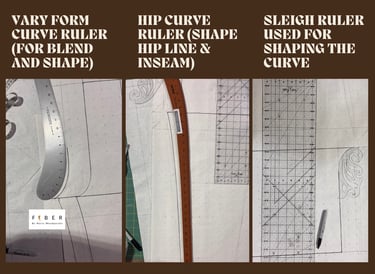
Vary form curve to blend and shape of crotch level
5- Measuring Tape
6- Metal weights
Hold patterns in place for tracing and marking
Online Store to buy tools:
WAWAK
AMAZON
ETSY
Taking Measurements:
Record measurements on the model (Form or Personal Measurements)
Measurements:
Method 1:
Record measurements of
Waist: Around waist
Hip: Measure widest area with tape
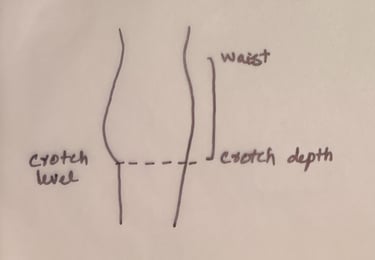
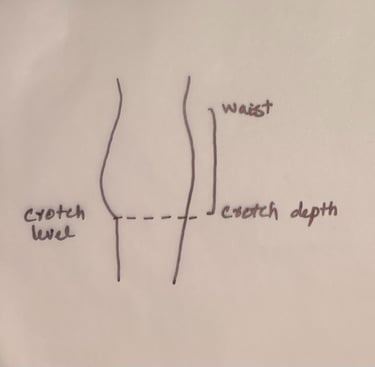
Crotch Depth
Crotch Length
Waist to knee
Waist to ankle
Waist to floor
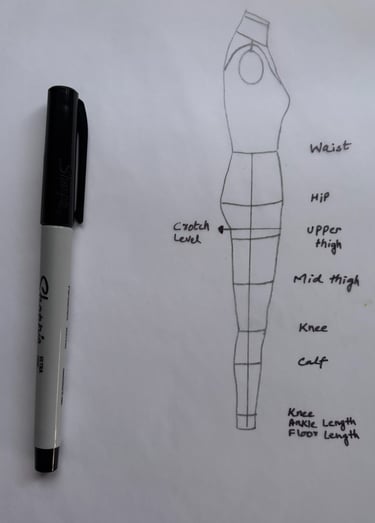
Method 2:
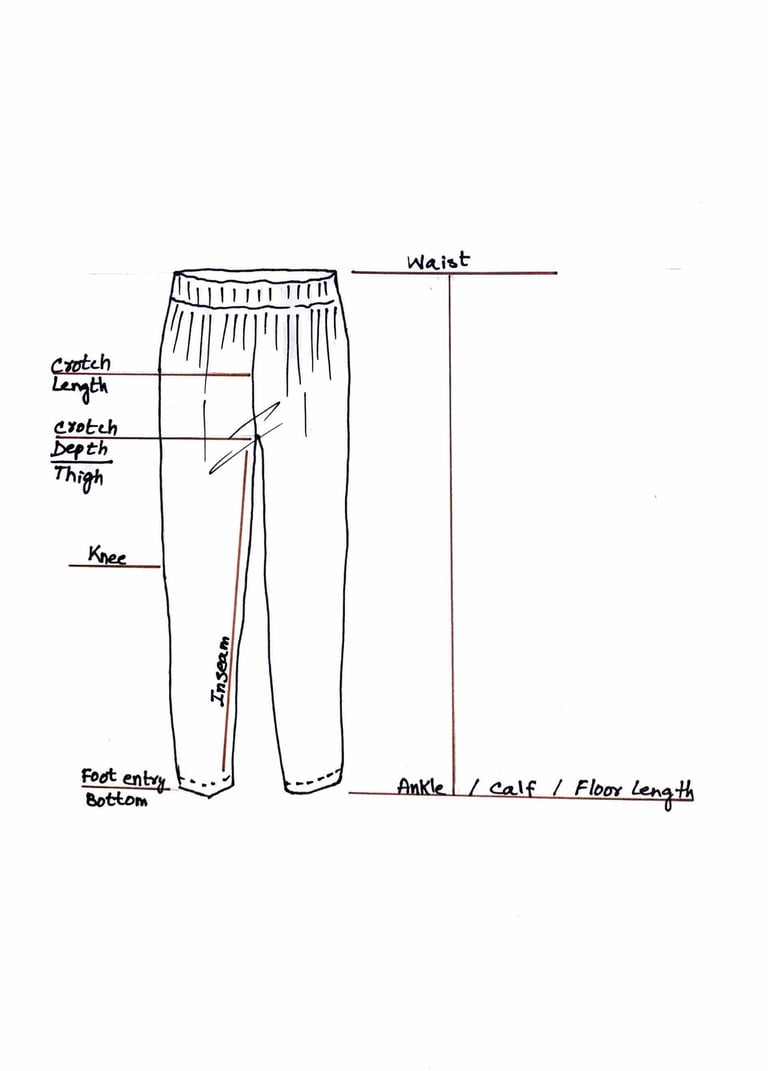
Record measurements of your favorite comfy loose trouser.
Full Trouser length
(waist to ankle length)
Inseam
(crotch to ankle length)
Crotch length
Crotch depth
Waist
Foot entry
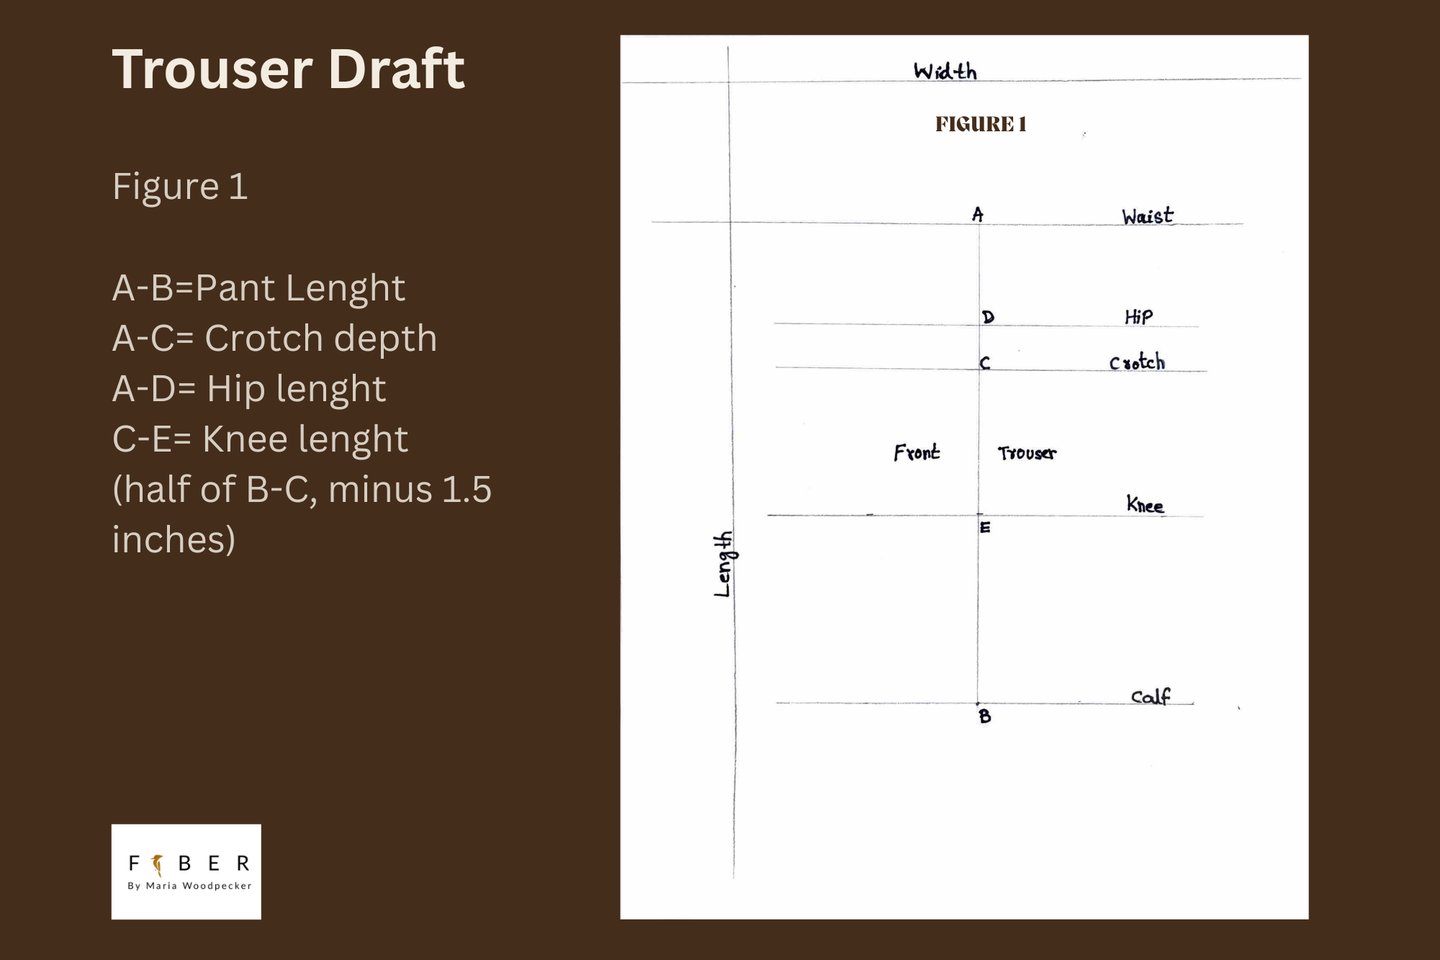
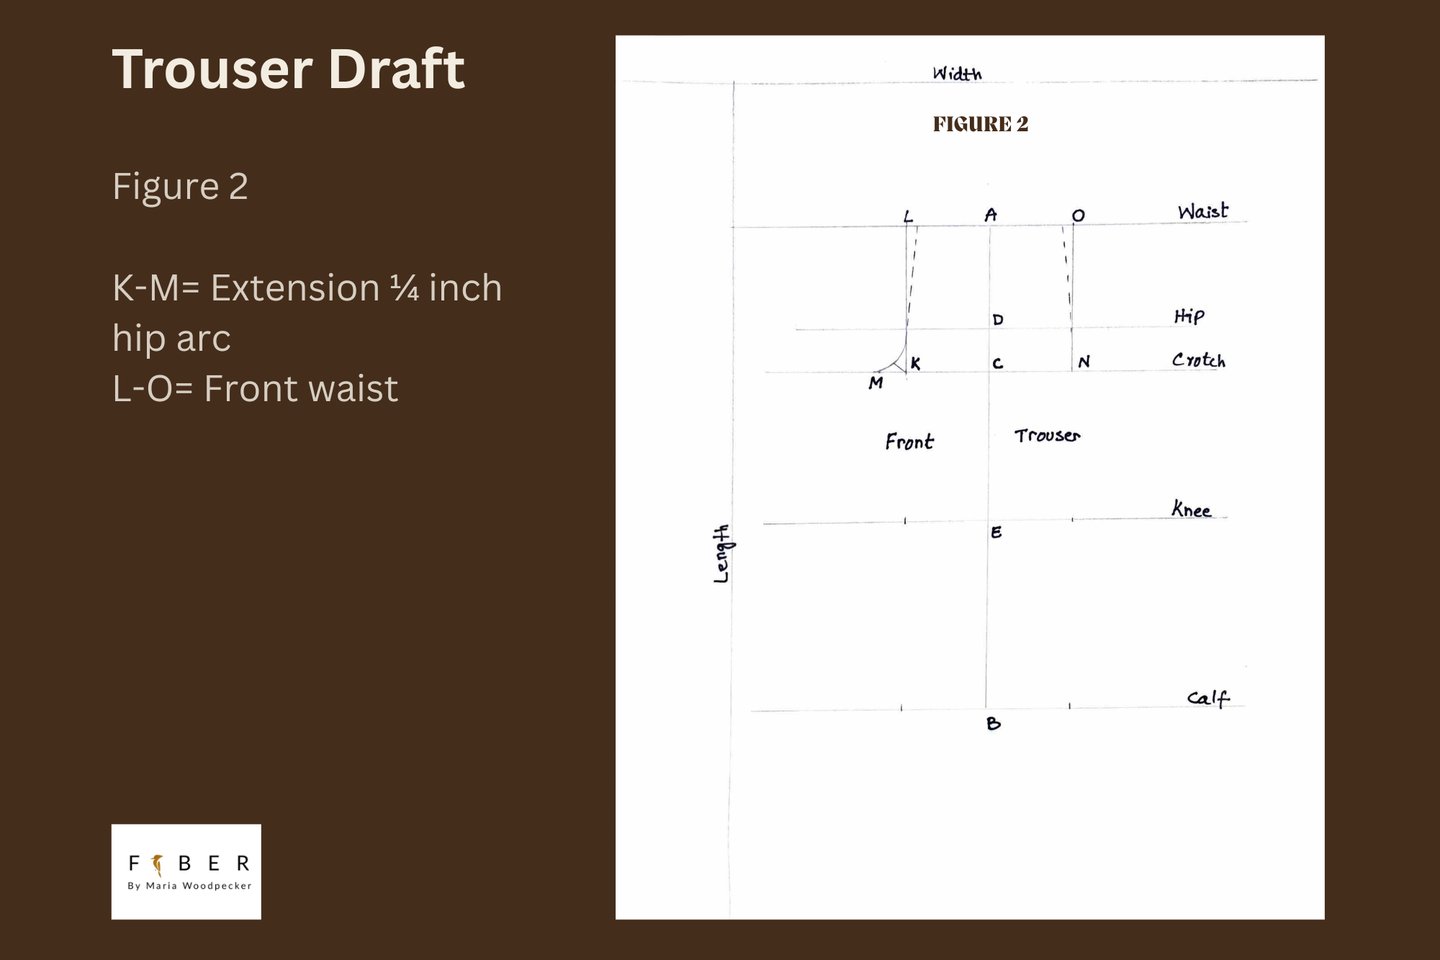
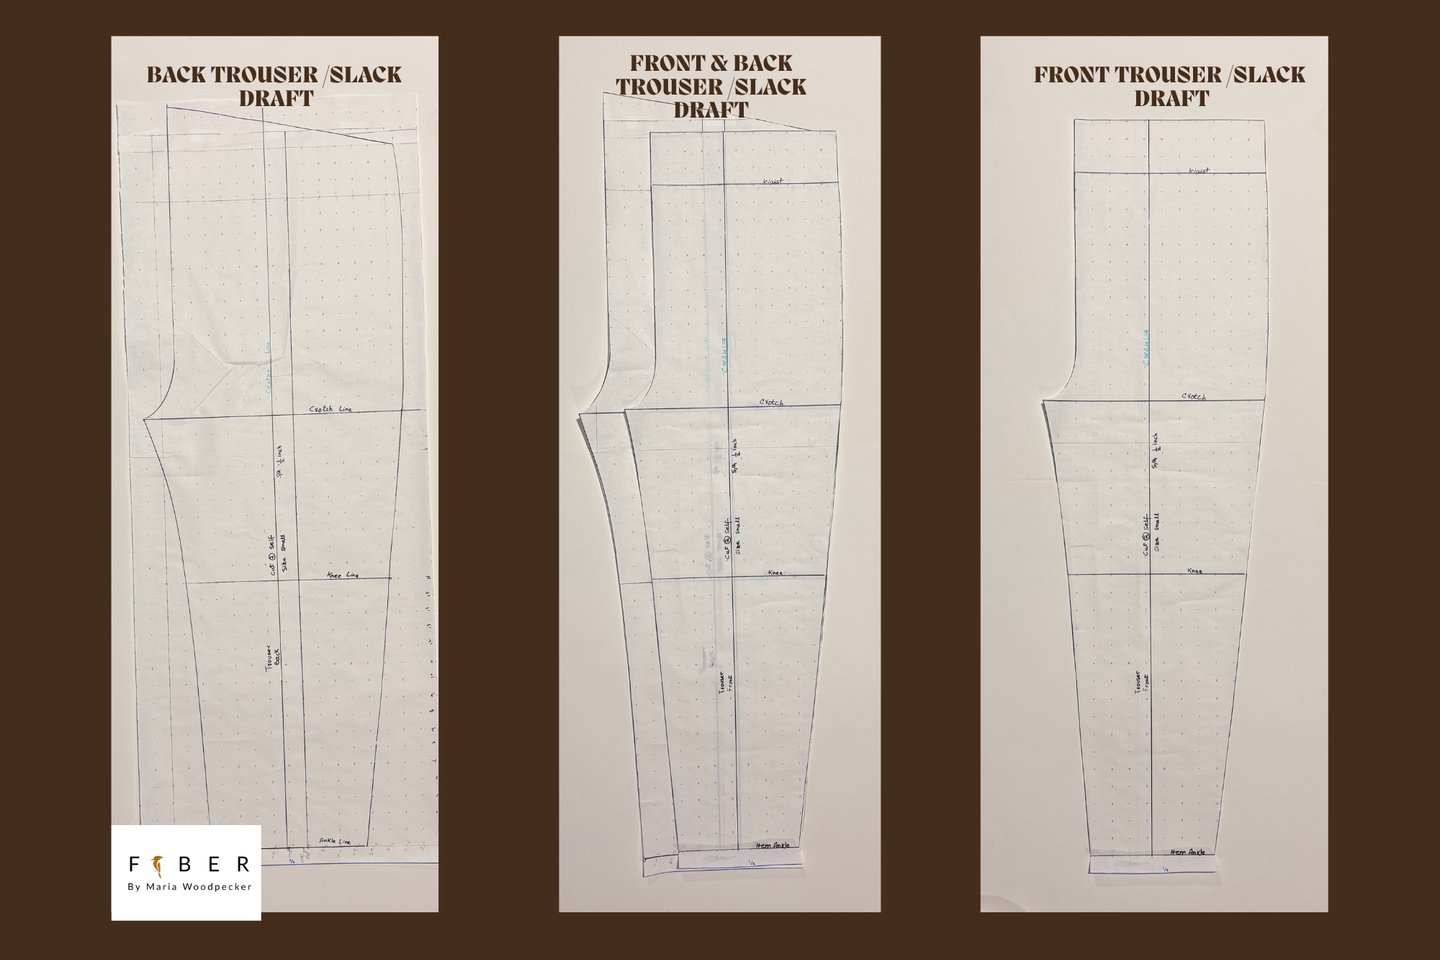
Draft Making:
This draft can be done on paper and then transferred to a muslin piece, or it can be drawn directly onto muslin.
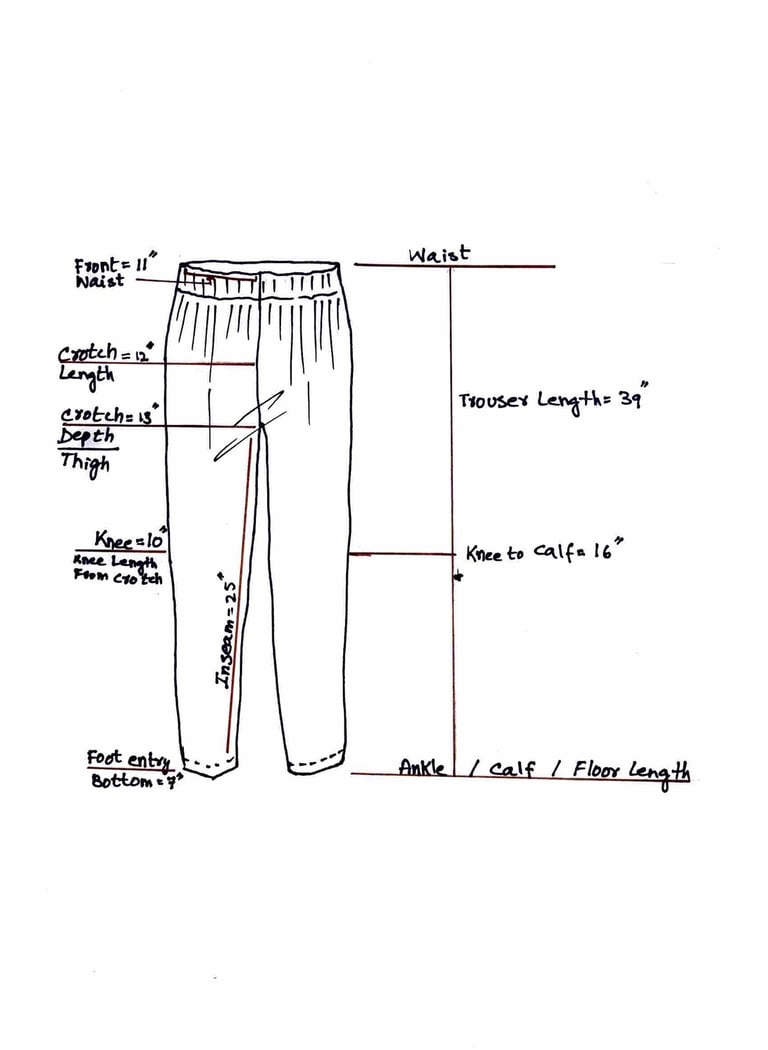
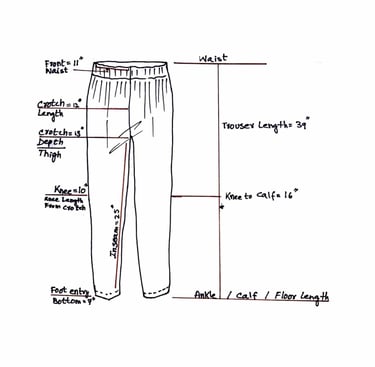
I measured my trouser (according to method 2) and measurements are below.
Note: measure your body measurements OR comfy trouser and work accordingly
Measurements in inches:
Trouser Length(Waist to ankle or calf) = 39 in
Crotch depth = 13 in
Hip length = 11 in
Knee length = 10 in
Knee to calf = 16 in
Crotch length = 12 in
Foot entry = 7 in
Knee width = 8.5 in
Front waist = 11 in
Inseam = 25 in
How to Work with Patterns
It is necessary to have a good understanding of garment construction in order to understand two dimensional pattern.
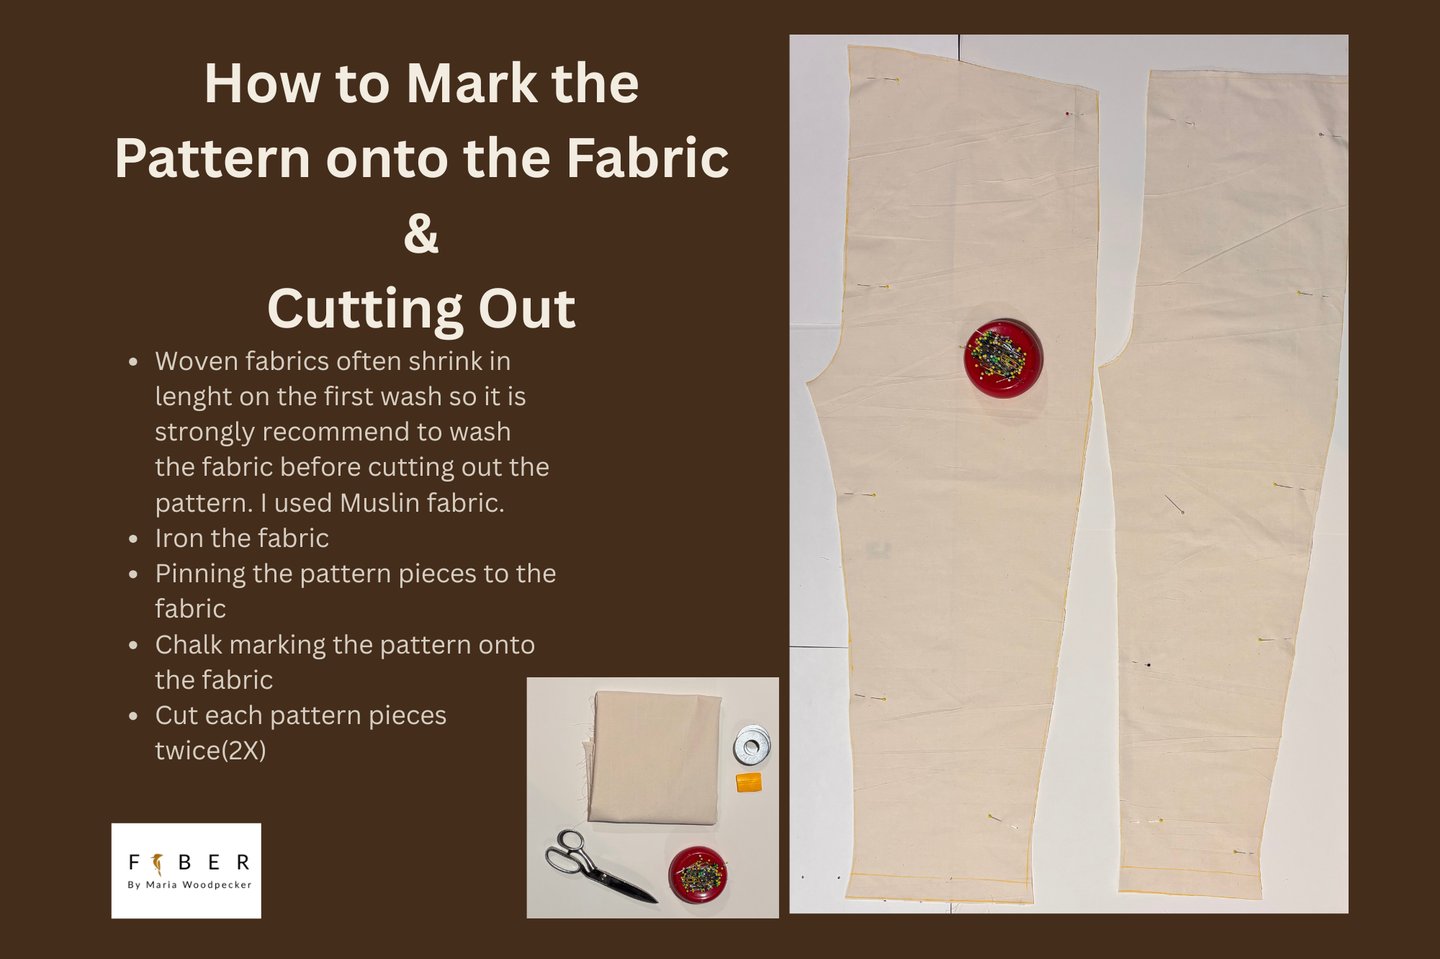
Once created, the pattern is then cut out in a sample fabric. I used muslin fabric as a sample fabric.
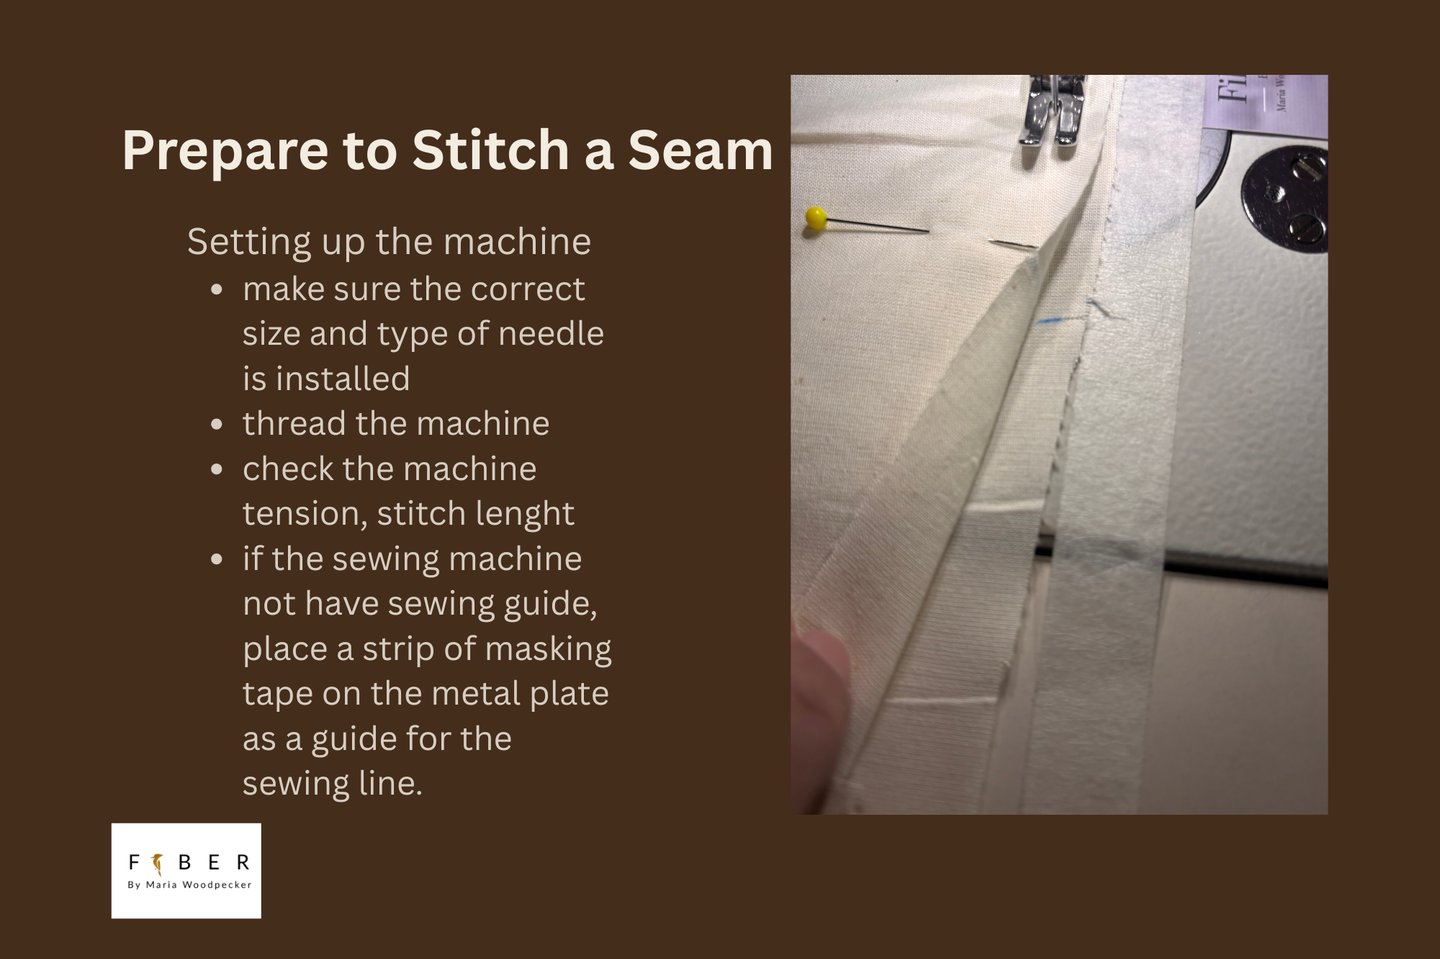
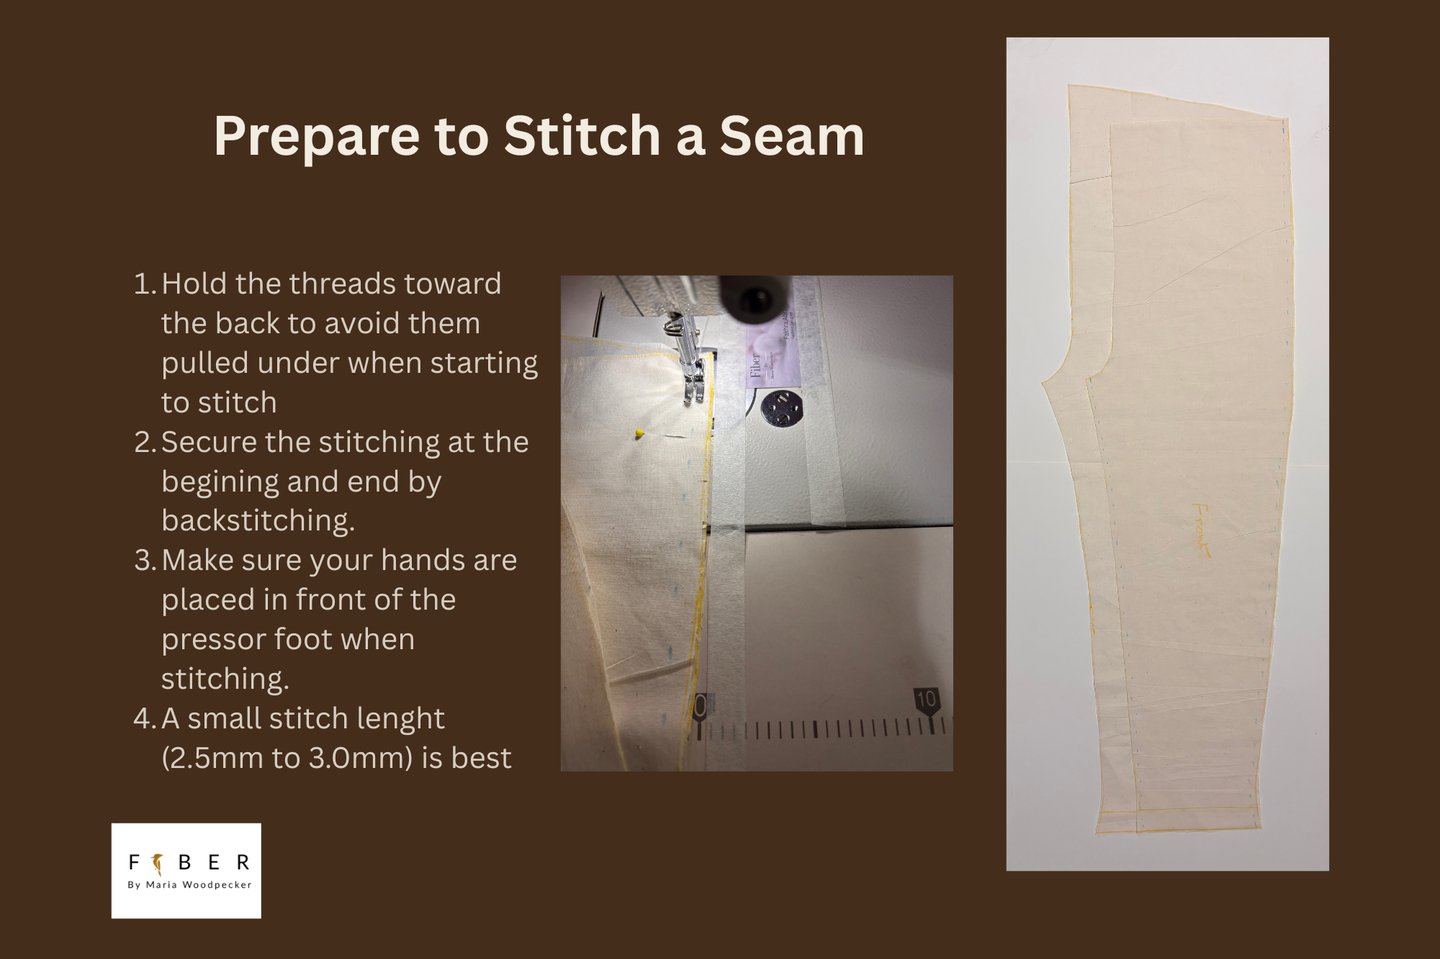
Seam Allowance
Seam allowance enables you to sew the garment pieces together and to attach other garment parts for example, facings, collars and closures(zippers).
Most garment seams 1cm or 3/8 inch: this is the most widely used seam allowance.
Make sure seam allowance is added to all pattern pieces before sewing.
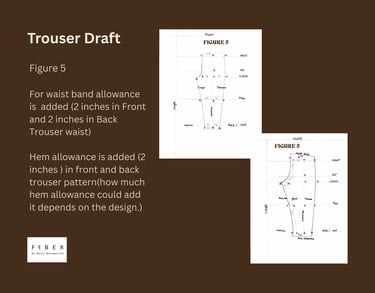
Hem Allowance
The hem allowance is the width between the hemline and the hem edge.
I added 2 inches hem allowance in the trouser pattern.
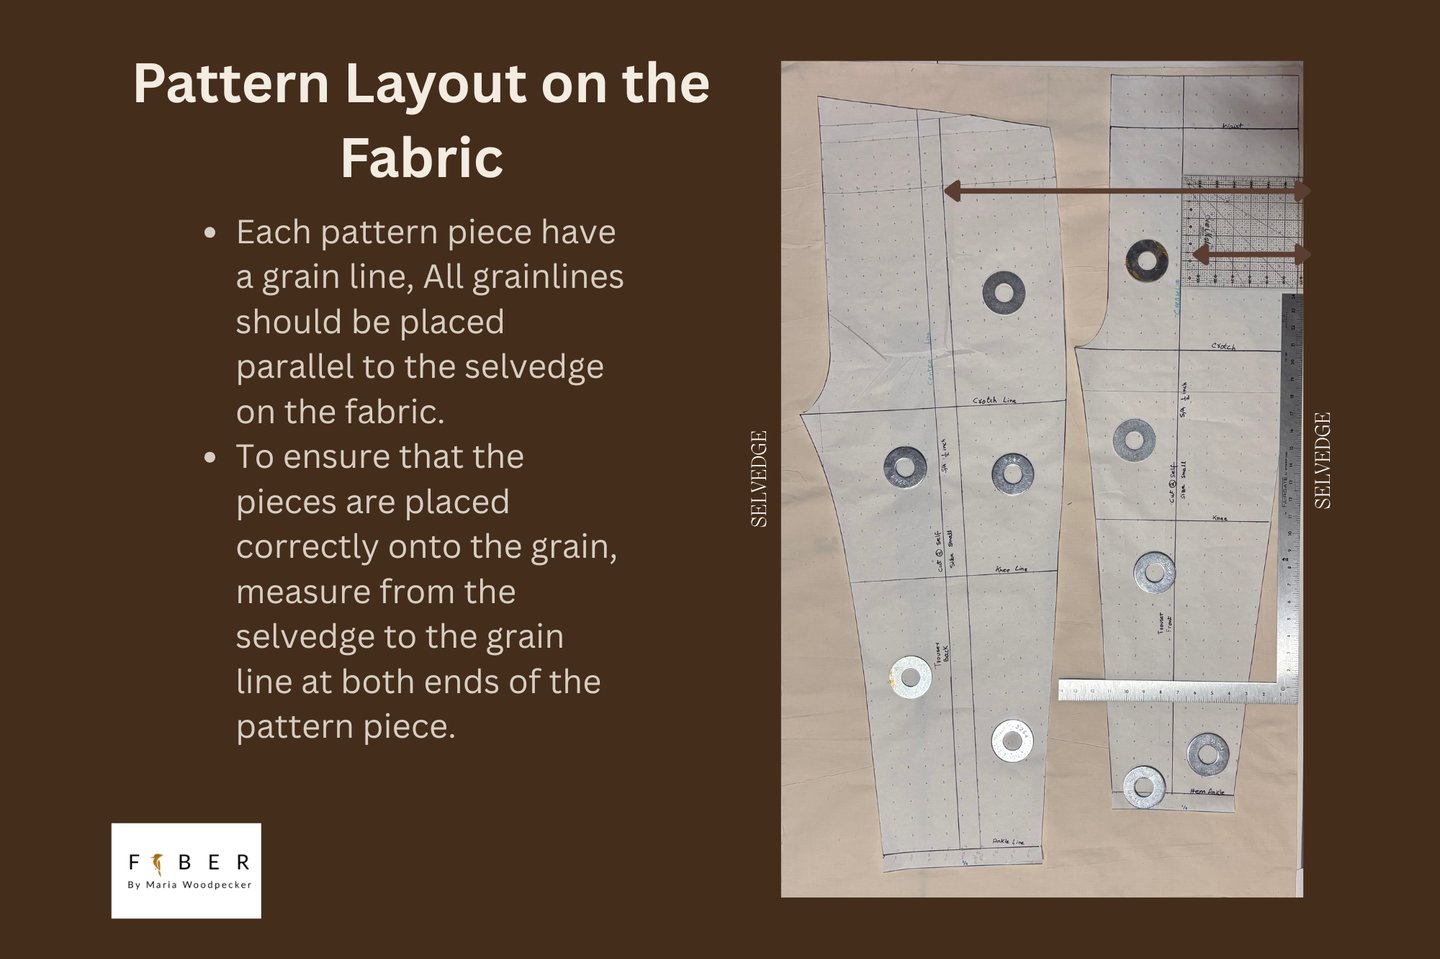
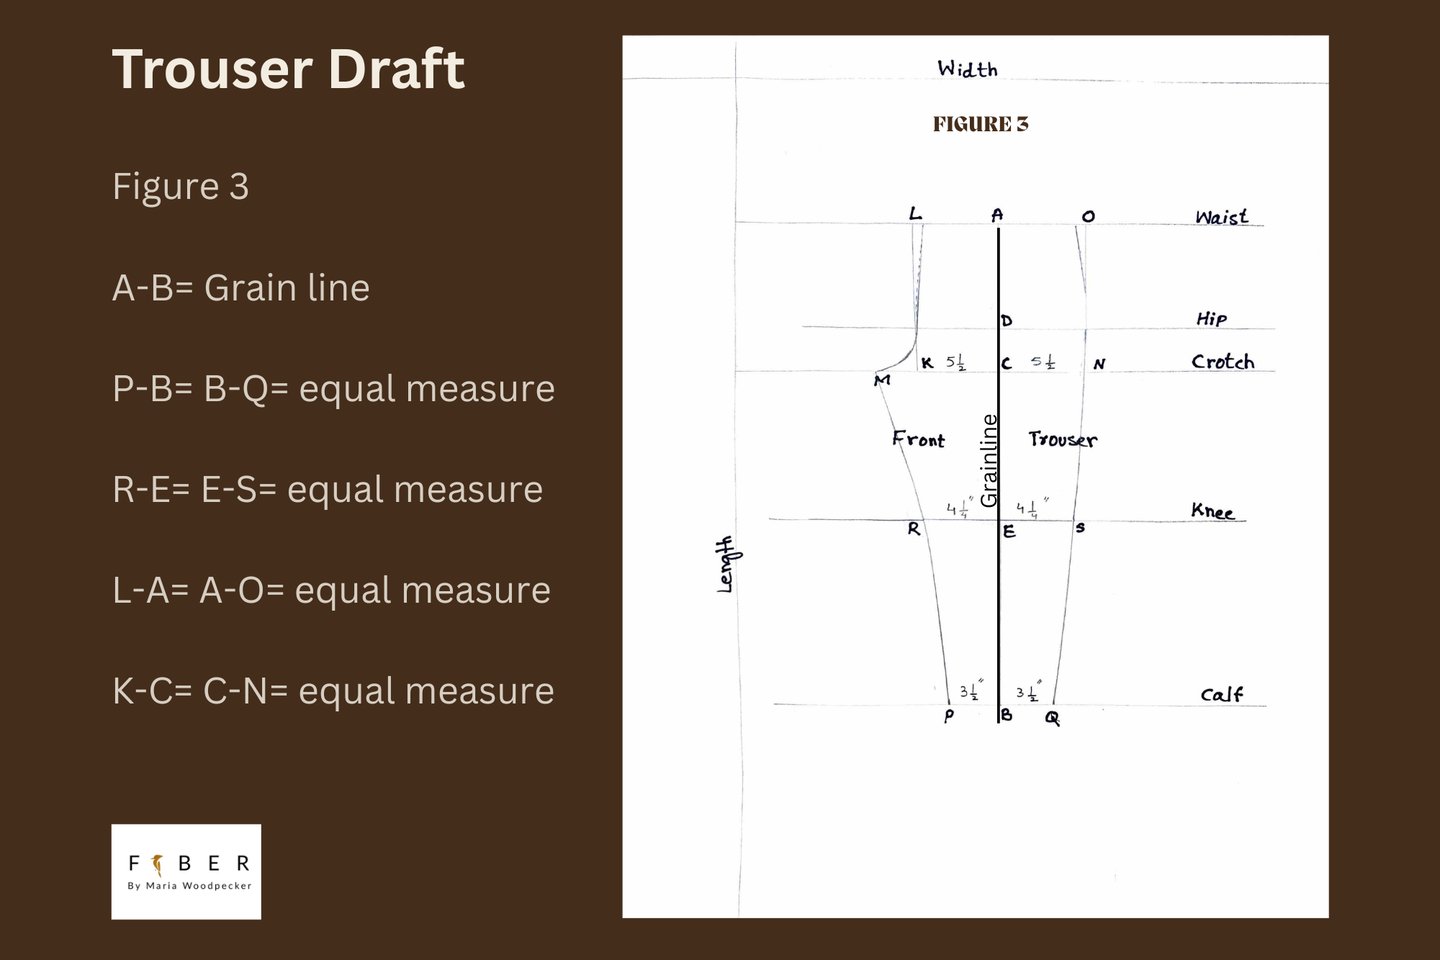
The grain indicates the yarn direction. A pattern piece can be cut lengthwise, crosswise, or on the bias.
In this trouser making blog, all pattern pieces cut out on lengthwise grain or straight grain.
How to Use the Grain Line